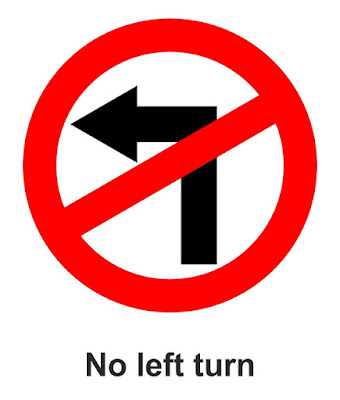
Object shaping is basic method that we have to master it on object manipulation activities in CorelDRAW. As it is good for efficiency of time, as when we intent to create an object that composed from multiple objects. We have to either Weld or Trim object that noticed which will be used . Okay for example implementation of Weld and Trim lets create an object below :
A. Create Object 1
Step 1
First we create a circle with 24 mm of its radius, so enter with 48 mm on each value box of X and Y.
 |
| Circle Diameter |
Step 2
Duplicate our circle with copy (ctrl+c) then paste (ctrl + V), then reduce the scale to 75 % then finally we have two circles.
 |
| Change the percentage scale value from scale factor column |
Step 3
1. Fill objects with red color.
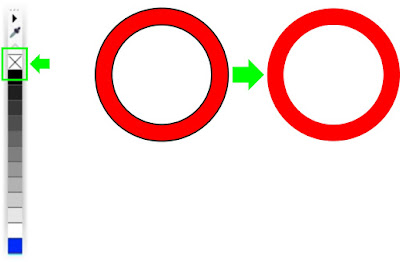
2. On this part we are using transformation object which is object trimming and now select two objects, from property bar choose Trim to make hole over big circle with small circle as the trimmer.
3. Select circle then on color pallette right click no color section to make the outline disappear.
Step 4
Select Rectangle Tool or F6 (keyboard) now lets continue to create square with Length: 20 mm Width : 2.7 mm then lose the outline and fill with red color.
Step 5
Rotate the object 35 degree
Second option we can rotate object manually : press ctrl and hold mouse then rotate it twice.
Align the both objects square and circle by select them and press (Keyboard button E + C)
 |
| Object 1 |
On this part we are using transformation object which is object welding and now select two objects, from property bar choose Weld to merge both object into one object and lets mention it as object 1.
B. Create Object 2
Step 1
Lets create isosceles triangle with Polygon Tool or Y (on keyboard), On value column insert “3" as side number for the triangle and set value for X : 5 mm and Y : 5.8 mm.
Step 2
Select Rectangle Tool or F6 (keyboard) to create two squares first with Length (X): 6 mm Width (Y): 2.7 mm then the other one is X : 2.7 mm andY : 9 mm.
Step 3
Align these three objects with this position :
Once again this is object shaping method we use again, and please remember we will often using this method in our activities. Okay lets Select all three objects then on property bar choose Weld to merge object into one united objects lets mention it Object 2.
Next we fill the object 2 with black and use no outline.
 |
| Object 2 |
C. Combination of Object 1 and Object 2
Lets align object 1 with object 2 by select them then push ( Keyboard button E + C), now both object are aligned vertically and horizontally. But visually object 2 was not well center aligned toward object 1. Then drag object 2 to left direction manually by holding both Ctrl and left click, move the mouse to left direction or use left arrow on keyboard until it reach the center of object 1 vertically aligned like picture B :
 |
| A. Sejajarkan kedua obyek B. obyek 2 geser ke kiri C. Obyek 2 di belakang obyek 1 |
After position is aligned we have to place object 2 is behind object 1. Select menu Object >Order > Behind... > choose object 1.
Press F8 on keyboard and make teks “No left turn” place it under the two objects then align it center vertically.
From now we have understood the implementation of object shaping
which is welding and trimming as main method. We will often using it
in process so we need to be familiar with them soon.
The benefits of these method are :
Reduces the complexity of object shape.
Reduces the number of nodes on object’s line that will reduce file capacity
so then it will make CorelDRAW’s reading capability more fast.
Well then I hope this article may has lot of benefit and if there something
unclear explanation that makes misunderstanding don't hesitate to make
a question, thanks for your time.


0 Komentar