To align objects in CorelDRAW we go to Tab menu Align and
Distribute or if we already familiar remember to that menus
so for time efficiency it is better to use shortcuts anyway.
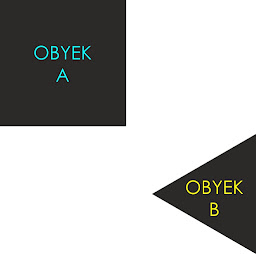
For example we intended to align two objects :
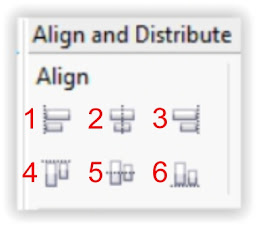
Select the two objects then on Tab Align and distribute choose type of aligns :
- Align Left / Keyboard (L) Align the left edges of objects
- Align Center Horizontally/ Keyboard (C) Align the center of objects horizontaly
- Align Right / Keyboard (R) Align the right edges of objects
- Align Top / Keyboard (T) Align the top edges of objects
- Align Center Vertically / Keyboard (E) Align the objet centers vertically
- Align Bottom / Keyboard (B) Align the bottom edges of objects
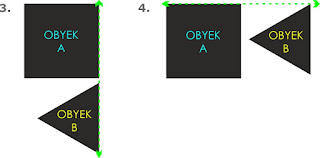
These are the results from align object processes :
now we have understood how to align between objects automatically.
We not only can align objects to another objects but also to another points or page.
And there another method to align that usually to be used on object
with complexity so that need self customization.
Below is an example that for us that kind to be difficult to align the three
text objects “Lorem Ipsum” to the every bottom parts of wing logos
automatically when we use Align and Distribute menu.
So this is the context we need to use guidelines as guidance tool to align
object manually.
Guideline can be activated from top section ruler for horizontal direction
and from left side section for vertical direction, just hover the mouse on
those ruler areas and hold click mouse then drag to work page area.
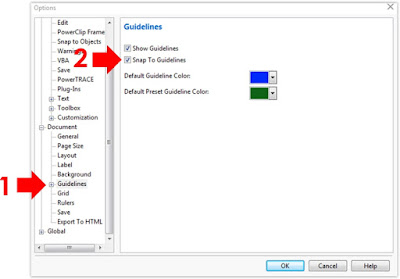
Before activate guidelines we need to make sure that objects will get stick or snapped to guideline : activate snap from menu Tools > Option... and give checklist.
 |
| activate object snap |
For this tutorial we only need horizontal guideline so then hold click mouse and drag it from top section ruler to the every wing logo’s bottom sides.
 |
| Activating guideline from ruler area |
and then one by one drag the text object “Lorem Ipsum” downward until it get snapped to guidelines, drag them with hold ctrl keyboard or directly.
After all text objects got snapped to each guidelines then decision is up to user whether let them on work page area or need to be erased. To erase them from work page area just click on each one of them and press ctrl + A to make entire selection then hit delete by keyboard.
please notify that guidelines is non printable objects and viewable on every page.
Guideline’s direction is not just applicable for horizontal and vertical but also enhanced rotatable till 360 degree.To do the rotation just click twice until two handles (a) and its axis (b) are appears, mouse pointer automatically will transformed into rotation cursor when mouse hover over guideline. Click + hold mouse and make rotation movement, determine the position of axis in order to gain precise rotation.
 |
| Rotation mark on guidelines |
 |
| 45 degree rotated guidelines on object |
 |
| Finished object with guidelines erased |
Designer will need a lot of this method especially when working with logo design projects that must complied with construction detail at every shape parts, line markers like guideline will help a lot. As beginner also need more do training about object Align and Distribution frequently because this is the part of beginning learning stage.


1 Komentar
Evolve your desk on line casino game with the choice of stay on line casino games 1xbet from Evolution. Home of award-winning stay on line casino games together with Crazy Time, Monopoly Live, and Infinite Blackjack. They additionally help 3,000+ games on cellular – excluding quantity of} hundred slot machines, you can to|you possibly can} actually put months of leisure in your again pocket.
BalasHapus